Free your robot vacuum from the cloud
How to use the robot vacuum without a cloud and integrate it with Home Assistant. With that, some pros and cons of a used older robot vacuum.

In 2017 I bought a Xiaomi Roborock Vacuum Gen 1. Best purchase I have done! I am super happy with it. This guy is vacuuming every day.
I had it integrated with the official Xiaomi Integration in Home Assistant and it did run every day when both of us left the house. Perfect automation I must say.
Now we have moved and we have a second floor and I was intrigued to get a new vacuum cleaner for the second floor.
Research showed me there are a few good ones out there that can also mop. But for mopping to be effective you need a cleaning station and then prices go above 1000 Euros easily. Too expensive for my taste since electricity, and heating going up like crazy, just moved to a bigger place, and the economy going where it is right now.
Then I looked at newer vacuums around 300 to 400 Euros without a moping station but decided: I don't need the fancy stuff and I am happy with my current one. So I got on eBay Kleinanzeigen (the German craigslist) and got one for 90 Euros. It was even in better condition than mine and that way fewer hours of usage.
After using both vacuums in a more or less chaotic just moved-in environment I miss some features:
- Zone cleanup: A newer vacuum persists the state of the map. Mine does not therefore I can not tell the vacuum to just clean the kitchen or whatever. That would be handy.
- Virtual walls/ No clean zones: Our shower is at floor level which is amazing. But it would not be a good idea to let the vacuum clean just after a shower. Vacuuming water is not a thing. Solve with 15 Euros magnetic stripes but another unnecessary purchase.
- Better object detection: Not often but sometimes the vacuum does not recognize objects like shoelaces, our drying rack, etc. I think newer ones should be better at this. But this honestly works fine for me.
If I would be in the market for a new one I would check the Valetudo website and check their supported devices.
At the time of writing, this would be
- Dreame Z10 Pro (~ 400 Euros)
- Dreame L10 Pro (~ 300 Euros)
Okay, without any more bla bla: Here is the Valetudo installation and configuration with Home Assistant.
Setup Valetudo
Factory reset
In order to be able to install Valetudo on my particular vacuum you have to do a factory reset. Otherwise, the installation process failed like this:
./valetudo-helper-miioota-amd64 install-firmware v11_004028.pkg

Starting installer.
If you experience issues, make sure to disable your firewall and/or VPN.
Also, make sure that the robot is docked during the firmware update procedure.
If the install still fails, try turning the robot off and back on again and/or moving the laptop closer to it.

Robot discovery started...
Scan done.
Successfully discovered robot at 192.168.8.1
Reading firmware image..
Successfully read firmware image. Size: 116.89 MiB MD5Sum: bf0bcff62a811bf6ef5a138edaee7661

Listing for firmware download requests on http://192.168.8.201:45535/firmware
Response from robot: [ 'ok' ]
ERROR: Did not receive a firmware download request after 30s


Exiting..
For some reason, I had to try the factory reset several times. I tried different methods which I found online and to be honest, I really don't know which of these did actually works.
Installing Valetudo
First, we need to get the firmware file. This can be generated on the DustBuilder website where I used these settings:
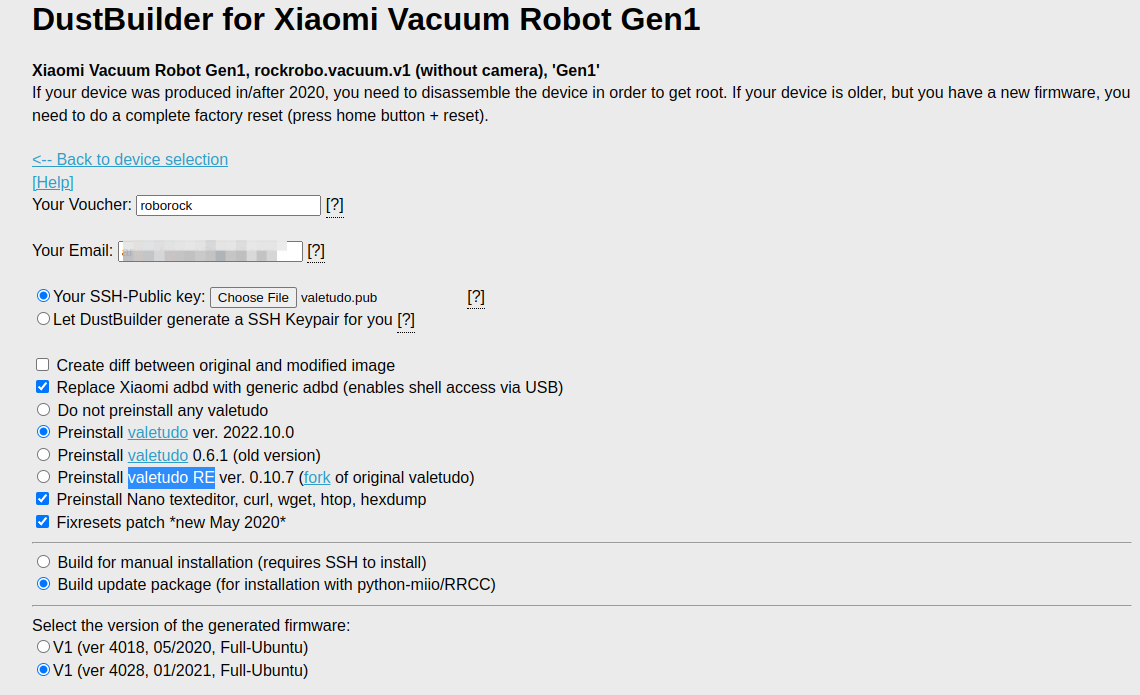
When you read this at a later point in time, follow the instructions on the Valetudo docs. That is what I basically did.
After filling this out the firmware will be built for you.
After waiting for a few minutes you get an e-mail with a download link.
Download the command line tool valetudo-helper-miioota
 Hypfer
and follow the command below.
Basically:
- you create a
valetudofolder - put in the downloaded firmware
- put in the command line tool
valetudo-helper-miioota - Run the tool and wait
cd ~/valetudo

ls
v11_004028.pkg  valetudo-helper-miioota-amd64

./valetudo-helper-miioota-amd64 install-firmware v11_004028.pkg

Starting installer.
If you experience issues, make sure to disable your firewall and/or VPN.
Also, make sure that the robot is docked during the firmware update procedure.
If the install still fails, try turning the robot off and back on again and/or moving the laptop closer to it.

Robot discovery started...
Scan done.
Successfully discovered robot at 192.168.8.1
Reading firmware image..
Successfully read firmware image. Size: 116.89 MiB MD5Sum: bf0bcff62a811bf6ef5a138edaee7661

Listing for firmware download requests on http://192.168.8.201:41981/firmware
Response from robot: [ 'ok' ]
Received firmware download request from ::ffff:192.168.8.1..

Download seems to have finished.
The robot should now install the firmware. It will take 5-10 minutes.

	If you like this application, you may want to consider donating:
	https://github.com/sponsors/Hypfer
Exiting..
After this, you should be able to set up the vacuum with the Valetudo Companion app, but this did not work for me.
You can still set everything up. The vacuum will create a WiFi, connect to that and visit http://192.168.8.1/. Here You can set up your WiFi settings for your home.
Basic setup
Now you need to figure out the IP of your vacuum and navigate to the Valetudo web interface.
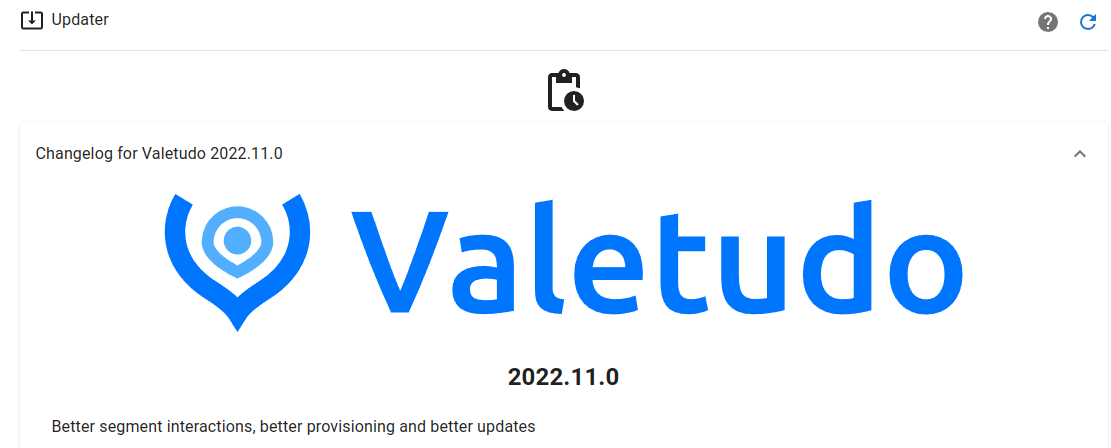
First thing I started an update because there was one available. My installed version was 2022.10.0 and there was 2022.11.0 available.
One crucial setting I have learned with a hard lesson: Set up Do not disturb.
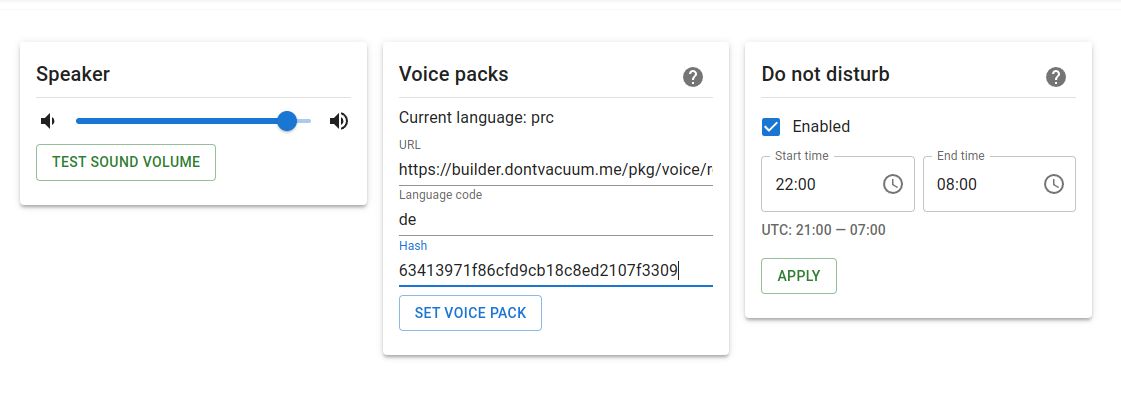
I also added a different language pack because I do not speak Chinese.
- Language pack: https://builder.dontvacuum.me/pkg/voice/rockrobo/voice-v1/
- Hashes: https://builder.dontvacuum.me/pkg/voice/rockrobo/voice-v1/pkgs.md5
Now mine speaks German 🇩🇪🙂
You could stop here and just use the vacuum with the web interface. There are also timer options available. However, I like to schedule my vacuum with Home Assistant and so should you as well!
Setup with Home Assistant
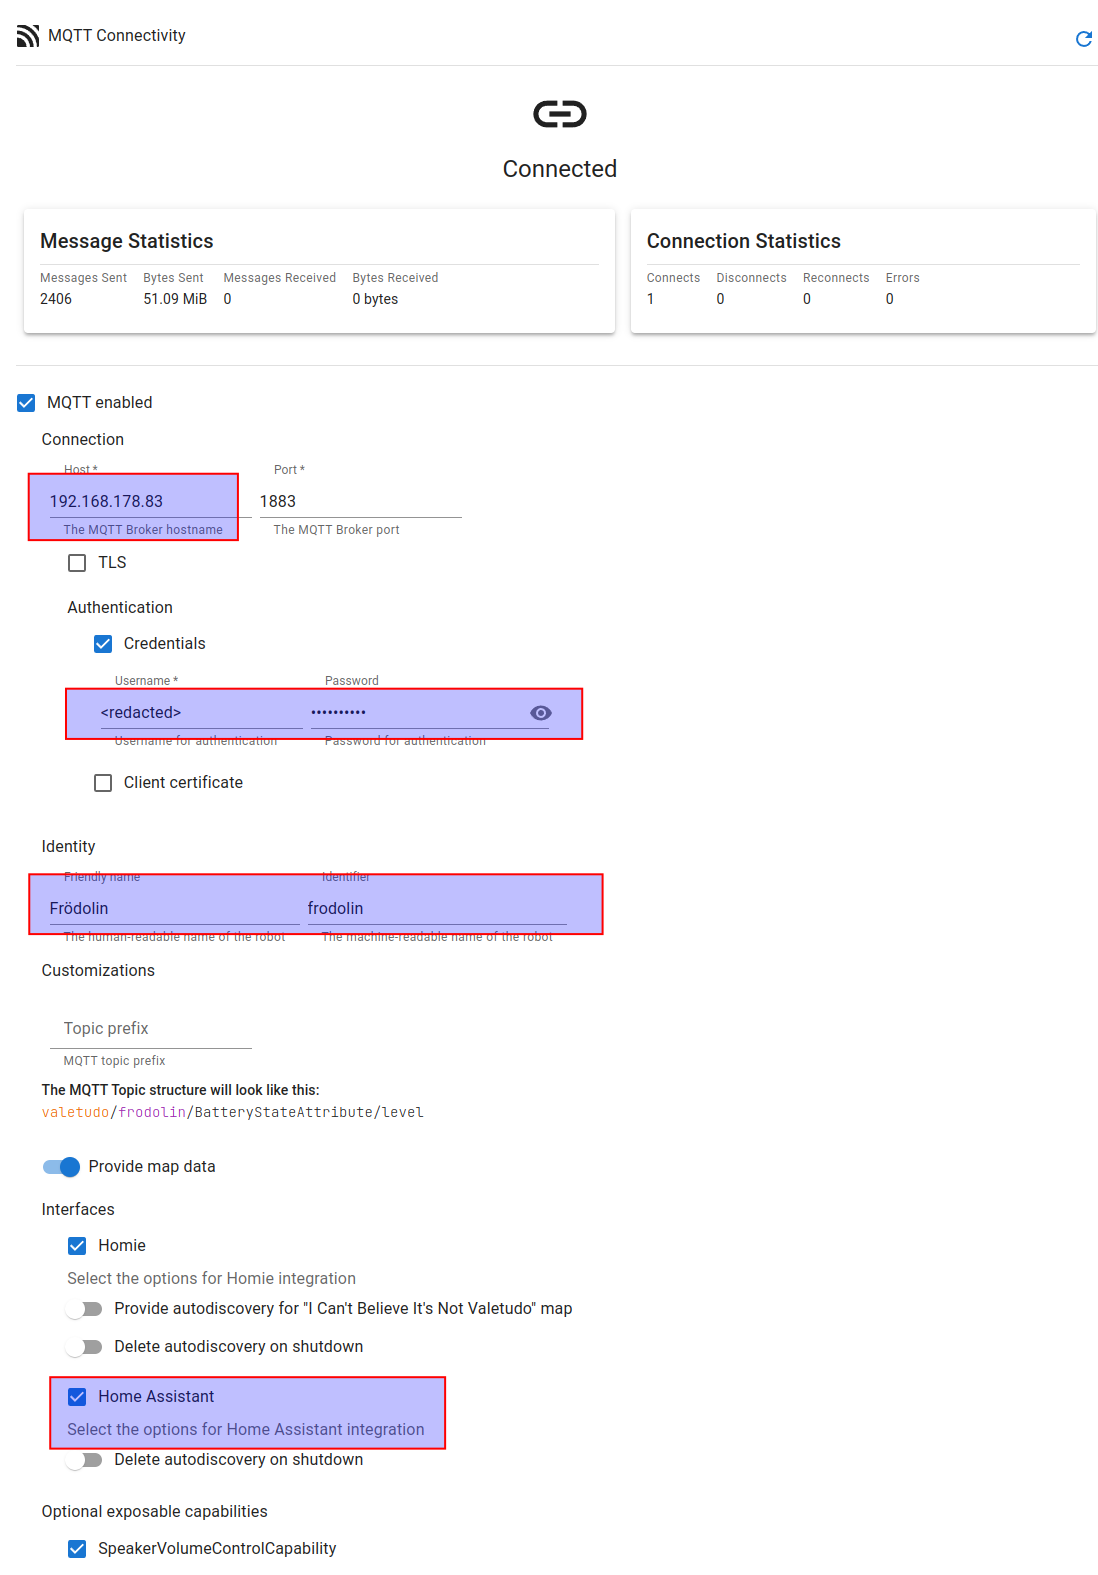
You have to connect your Valetudo-powered vacuum to your MQTT broker and then the device will pop up as an MQTT device.
For that head over to Connectivity -> MQTT Connectivity and provider your MQTT credentials.
I also changed the Identity settings.
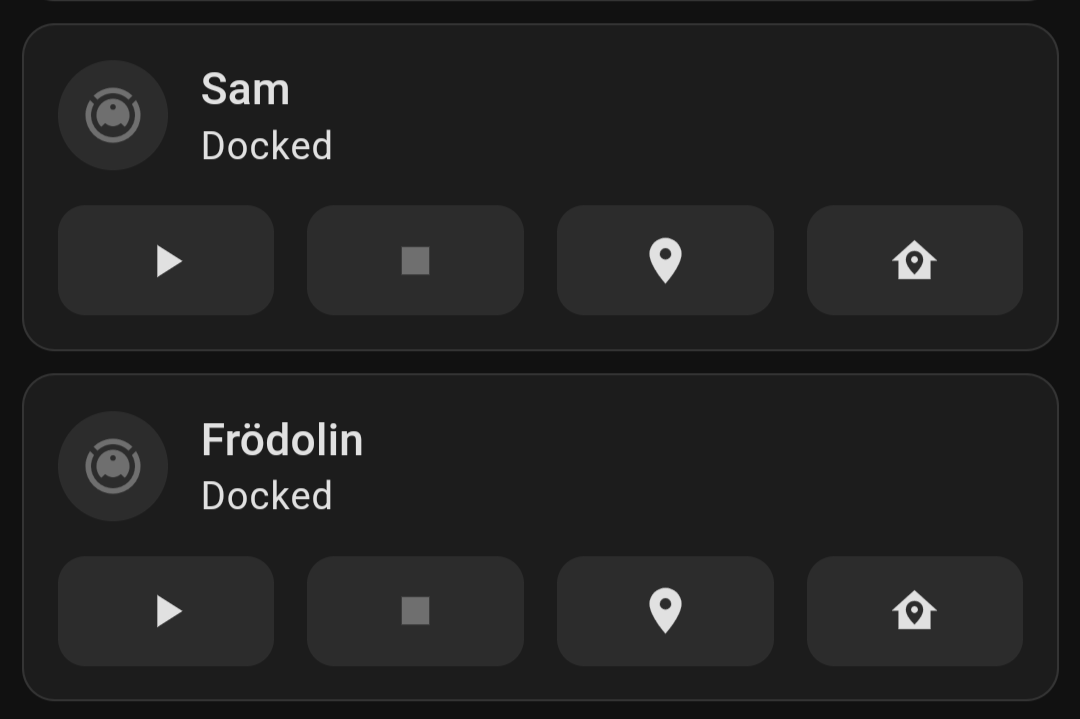
After that you can use one of the new Home Assistant Tile Cards which will provide you with all the features your vacuum has implemented:
Install valetudo vacum map card (optional)
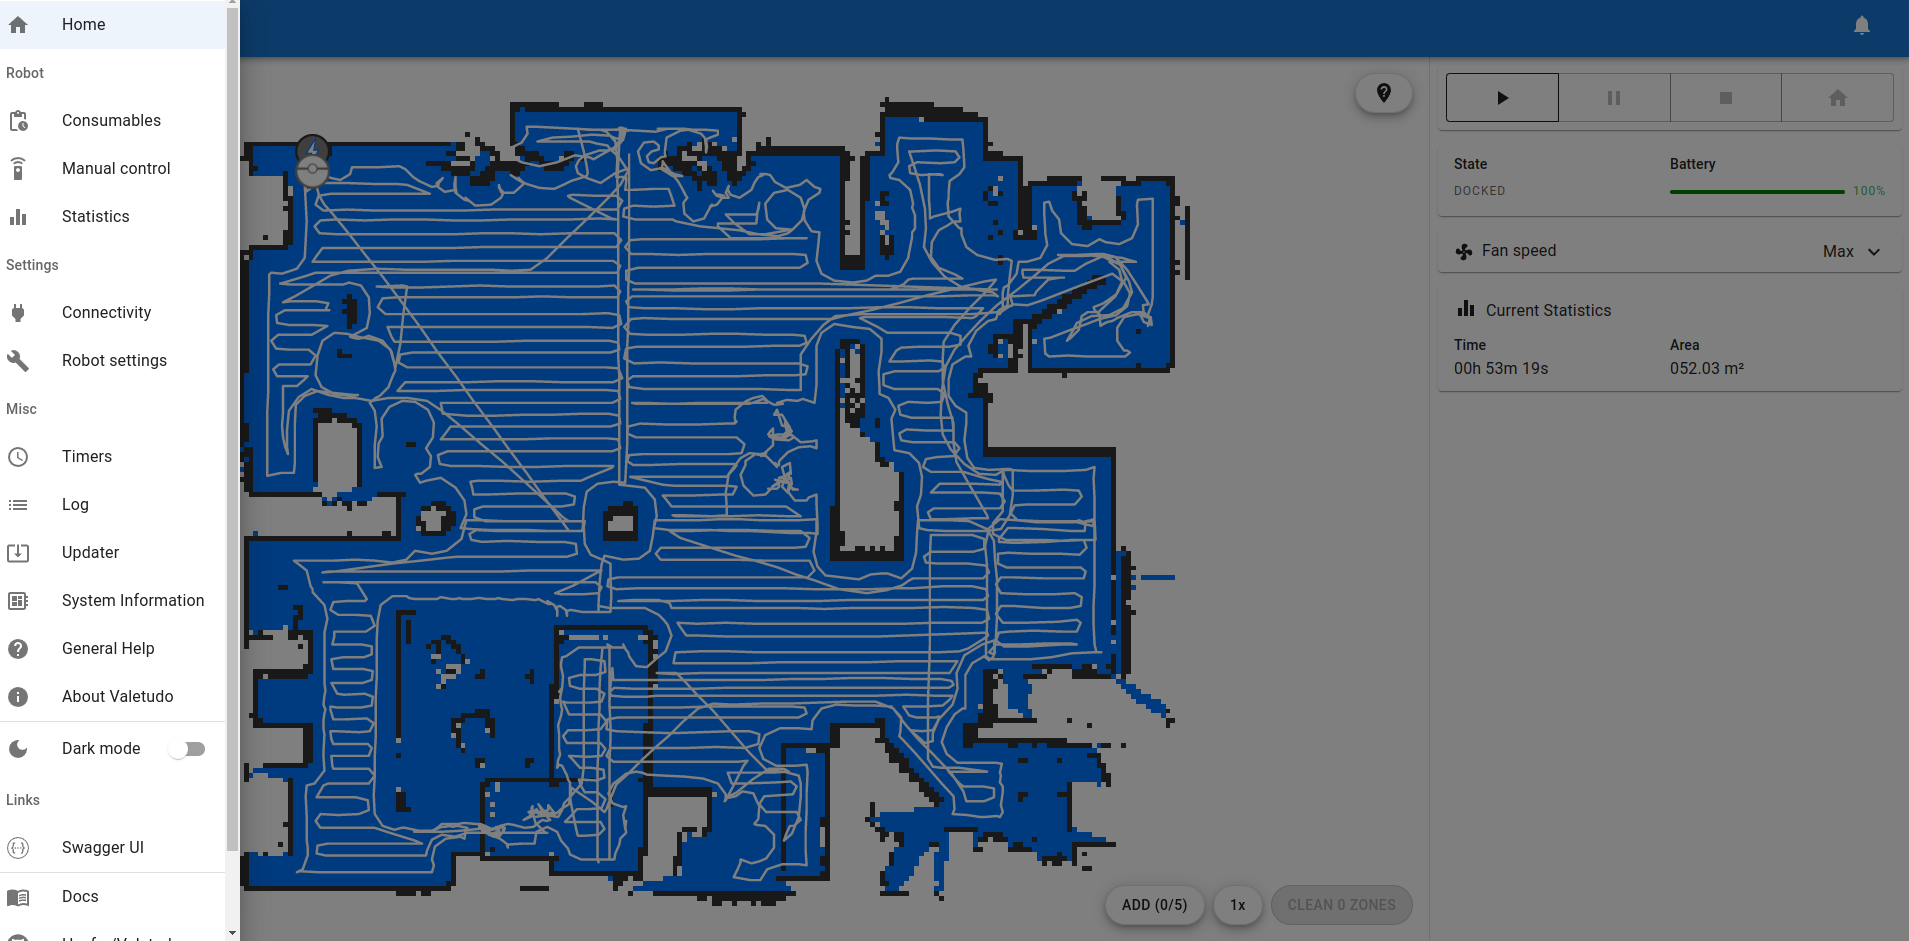
If you want to you can also set up some live maps for your vacuum which look like this:
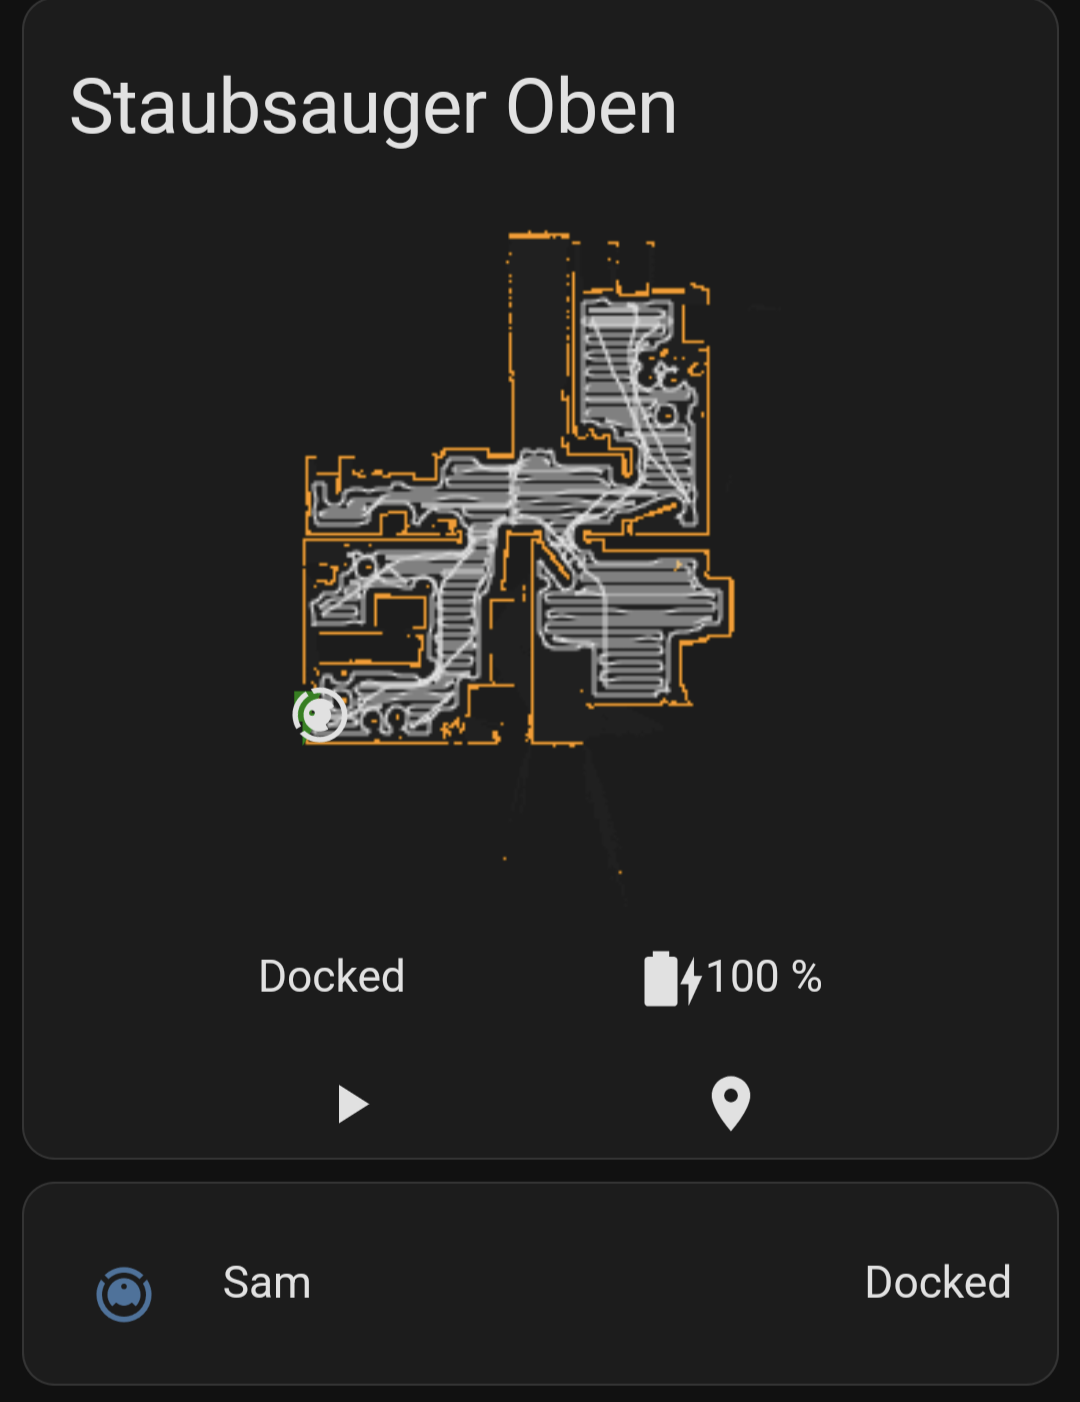
The map is updated fairly quickly. WAY faster than the Xiaomi app! But in my opinion, it's not super useful and makes the Home Assistant interface kind of sluggish. It is still cool though! So I just have set it up and moved this to a view that I will never use 😉
Here are the setup instruction for that map card:
Hypfer❤️That is it for today!❤️
Do you use a robot vacuum? If so did you ever consider having that device somehow cloud free? Especially now, when some of these devices get cameras 📸 for better object detection. Let me know in the comments.